Friday, January 28, 2011

Downstairs - Before

The laundry room and half bathroom aren't really worthy of their own before posts, so I'm going to lump them in with the den.  This portion of the house is where we made the biggest change to the layout.  This is what the den looked like when we took possession of the house:

Through the door on the left hand wall (in the second picture) is another bedroom.  I don't have any before pictures of that room. (oops!)  Both the laundry room and the half bathroom are located off of that bedroom as well as an exterior entrance.  (If you need a quick refresher on the layout you can find one here.)  The half bath looked like a bad gas station restroom, and the laundry room wasn't even as nice as the half bath.
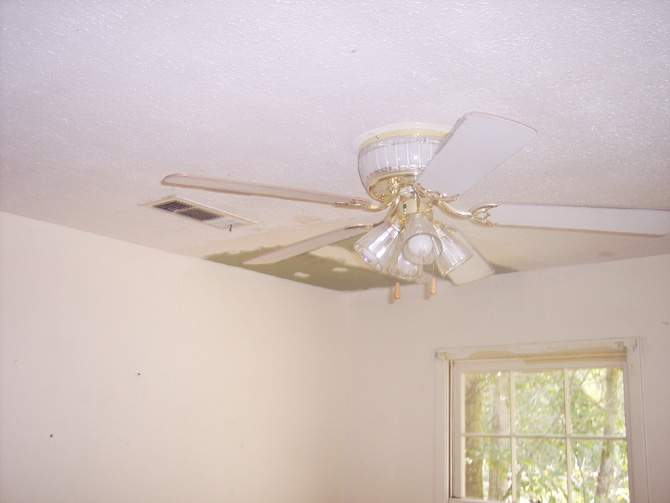

Yikes


Lets recap the downstairs:

Den
  • Sheetrock over paneling - check!
  • Uneven walls due to said sheetrock - check!
  • Wallpaper - check!
  • Tile not properly adhered to the floor - check!
  • Grout everywhere but under the couch - check!
Half Bath
  • Sink hanging from the wall - check!
  • Dingy tile - check!
  • Gross concrete block - check!
Laundry Room
  • More gross concrete block - check!
  • Concrete floor with peeled paint - check!
  • Sheetrock removed to uncover the return air vent - check!
Looks like everything is accounted for!


Thursday, January 27, 2011

The Kitchen - Before

Here is a tip for those of you thinking about fixing a leaky sink with duct tape...Don't!  I wish someone had given that tip to the previous occupants of our house.  When we walked through after the renters left the kitchen looked like this:


Kitchens and baths are notoriously expensive to remodel.  We were hoping that the kitchen would be functional enough that a major reno could wait a while.  Alas, it was not to be.  Soon the kitchen would look like this:


Look, a picture taken during the remodel process.  Enjoy it; it may be the only one I can find.
 
How about that surface mold...lovely!  Check out the light fixture in the shot below... We live in the south, so I completely understand having ceiling fans in the house.  In fact we still have several of them, but I didn't understand having one here.  Also below, our original color choice for this room.  Okay, I'm kidding.  That color choice can't be attributed to the renters either.  Prior to my parents buying the house the entire kitchen (including cabinets) was that color.  I actually don't hate the color.  I think it could look great on the right piece of furniture!


We did a lot in this room.  It was another room that had to have a new subfloor.  It always fun to gaze into your kitchen and see into the crawlspace beneath the house.


Wednesday, January 26, 2011

Main Bathroom - Before

So the guest bathroom was just more of the same.  I can't remember if we tore out all of the sheetrock or just most of it.  I think that we were able to leave the ceiling in place.  I do remember that we did not remove the subfloor in this bathroom, yay!


While I haven't hung wallpaper in years, I don't remember the need to cover each seam with a piece of trim...

Tuesday, January 25, 2011

Living Room - Before

I should probably title the post "Watch Your Step!"  Our front door opens directly into the living room (we're not cool enough to have a foyer), so the hole in the floor was pretty obvious to anyone who stopped by to say hello.  I'm sure that we didn't make the problem more obvious when we'd say, "Come on in and watch out for the giant hole in the floor."  We really didn't want anyone to get hurt, so we figured that we'd better fix it.  Here is a peek at what we were dealing with:


Yeah, it was a bit of a hazard, but an easy fix.  You know what the worst part was?  When we took out pieces of floor to expose all of the affected subfloor we could tell where they'd patched the subfloor and the floor planks before.  Seriously... you can't fix just the damage; you've got the fix the problem!  TBD's buddy is a floor guy, so once we fixed the subfloor he handled the hardwood repair for us.

I was pretty excited about the 15 lite door that the renters installed to divide the den from the living room; it's agreat way to separate the space without closing them off completely.  I wasn't quite as excited about the mini blinds.  The handrail in the other stairwell left a little to be desired too.  I am of the opinion that the handrail should run the length of the stairs.


We had one other quirky design element to contend with.  The picture is probably hard to see, but look closely and you'll see the texture that was the envy of the neighbors in 1994.  It was put on the wall to cover a bad patch job.  The patch filled in the hole left in the wall when a window was removed (when my parents bought the house).  You'd think that the window would have been removed when the garage was added.  I guess the previous owners liked to be able to check on their tools/car without opening the door; how convienent!


I'd Like to Thank The Academy

Check it out- I've been featured!


                                                      UndertheTableandDreaming


Hop on over to see all of the gorgeous projects being showcased this week.  After checking them out, all I can say is "Wow!"  I can assure you that I got in my the skin of my teeth, but it is an honor to be included.  Thanks Stephanie Lynn!


Monday, January 24, 2011

The Master Bedroom and Master Bathroom - Before

Originally our bedroom had some pretty serious ceiling issues; it was gross. 


I also didn't understand the thought process behind this sconce...why just one, why there, and why that one?  Random.


Besides those two things, the master bedroom was in pretty good shape.  It just needed the same basic stuff as the rest of the house: framing for normal closet doors, new windows, new electrical, a new light fixture, new interior doors, trim, refinished floors and paint.  Just your standard stuff that everyone has to deal with before they can move into their house, right?


The master bathroom was a completely different story. 


Absolutely nothing in this room was salvageable; we gutted it to the studs.  Even some of the floor joists had to be replaced.  I wish I had an in progress shot, but you can picture it; open the bathroom door and you can see the half bathroom below it.  The good part about all this was that opening up the wet wall between the bathrooms gave us the opportunity to see just how much plumbing repair would be needed, hooray!  The bad part was that we'd have to get rid of that awesome wallpaper.  So I'm exagrating.  There was no good or bad part; it all just meant more work!


We actually made the master bathroom just a little bit bigger by stealing a couple of square feet from the bedroom.  I think that we pushed the wall back by 18" (maybe 16").  Let me tell you, that foot and a half made a huge difference in the feel of the room. 

The bathtub was removed and a shower was put in its place.  An interesting fact about that bathtub...if you look closely you can see that the drain is on one end and the tub controls are on the other.  That is my mom's handiwork.  When they acquired the house this room was plumbed for a bathtub, but there was no bathtub.  So, it was either leave this setup, or choose between moving plumbing to the exterior wall of the house or lowering the ceiling in the half bath below this room.  She choose the easy option (and I don't blame her).


I told you that the bathroom wasn't pretty...
 

How about a little perspective on just how small this room was.  See the edge of the doorframe on the left of the picture?  See the toilet?  Well, there was a sink between the two.


Sunday, January 23, 2011

Productive Day Thanks to a Sweet Deal

Normally when The Boy's Daddy calls to say he's found a good deal on something it's something that he really wants, but I'm generally unimpressed.  Last weekend The Boy's Daddy was telling me about this great deal he found on a pressure washer.  We rarely have a need for a pressure washer, so we usually just borrow one from parents.  It turns out TBD wanted one of his own but knew I would be willing to spend the money.  He was right though; he had found a great deal.  He found a display model (of sorts; it had been used at the store) similar to this one marked down to $60 and an extended warranty for $6 - Yes please!
The Boy and his Daddy got so much stuff done on Saturday!  They pressure washed everything that stood still- the house, the deck, my car, the Jeep, the dog's house and the BBQ.  Wow!  I hope the novelty doesn't wear off anytime soon, because they put a serious dent in the To Do list.

I took a picture of The Boy with Daddy's new toy, but did not turn out well.  Instead I figured I'd use a picture of the Dynamic Duo taken this summer Tybee Island.  (The Boy has pointed out that he does not need training wheels anymore.  He is a big boy.)


Then I started thinking about Tybee.  I love Tybee, and I love this picture of a Tybee sunrise taken on the same trip as the picture above. 


Saturday, January 22, 2011

What you Talkin' Bout Willis

I've been thinking about the changes that we made to the layout of the house (there weren't that many), and I think that a visual aid might be helpful.  I tend to ramble and such, so this may help clarify things.  The original budget (and timeline) for a "fix it up quickly so we can move in" remodel was small.  We were going to keep the layout of the house untouched so that we could save money and get things finished quickly.  We blew through the original budget (and then some) and made minimal changes to the layout.  So yeah, our plan failed- oh well! 


Here is the main level of the house; the front door is right by the coat closet (isn't that convenient).  For some reason, the wall that blocks off the kitchen doesn't quite block the whole kitchen.  It stops about a foot from where the kitchen floor ends (the back of the cabinets - a logical place).  Why the wall didn't stop the same place is beyond me.  Random!


Main Level
 

This is the top level of the house.  Three bedrooms and a couple of bathrooms.  Pretty basic stuff.


Top Level


The bottom level of the house (you could tell from the header that the house was a split level, right?).  I know that I didn't include measurements in the drawings, but let me point out that the den is right at 22' deep.  The more narrow portion of the room (by the stairs) is 8' wide.  What does one do with a room that deep and narrow?  It is too narrow to really make zones (since the logical placement for the TV is next to the stairs), but if we didn't create zones the TV characters would looks like little tiny army men (the green ones).  We were perplexed.  Also the half bath - yeah, it's 5' wide and 10' deep...

Bottom Level


Friday, January 21, 2011

Pillow Project

Okay, so this is nothing new; in fact I've been meaning to get around to this project for - I don't know - a year.  Well today I checked it off of my "To Do" list.  Okay, so it's a mental list.  I'm too lazy to write it down; hence the need for a blog to make me document stuff.

Step 1 - Make friends with someone who buys a lot of rice - in bulk, and persuade them to store the rice in another container.  This is part of the reason it took me so long to get around to this project.  When one buys rice in bulk one does not buy it often.  I guess you could buy your own rice, but not us.  We went on south beach about a year ago.  I miss rice, but I digress.


Step 2 - Go buy a pillow form or some filler.  My bag was an odd size, so I used filler.


Step 3 - Stuff the bag with filler.  Better yet, put the filler on an old pillowcase or t-shirt and make your own pillow form.

Step 4 - Zip the bag closed.  Yeah, my bag had a zipper because I'm cool like that.


It took me a year- for that!  Now that it is finished I'm trying to decide where it should live, and if I should remove the handles.  I want to leave the handles, but I think The Boy might turn it into a weapon.  It would be like a giant Homie sock, because The Boy don't play that!


Today's Creative Blog

Thursday, January 20, 2011

Marmalade - Update

When passing by my parents house the other day I noticed that their citrus trees were loaded with ripe fruit.  What does one do with an overabundance of grapefruit and oranges?  Give them to your daughter of course.  And what does the daughter do with them?  Marmalade!  I've made lots of different types of jams and jellies, but this was my first foray into the world of marmalade.  That night I made a batch of grapefruit marmalade.  I'm a little worried that it cooked too long.  Hopefully it sets properly, and if it does I'll post a recipe so that I can remember next season. 


UPDATE:  The marmalade set...boy did it ever set.  I'm pretty sure it could break a tooth (might have cooked it a wee bit past the gel stage).  EPIC FAIL!

The Boy's Room - Before

The Boy's Room required minimal work to whip it into shape.  Once the new electrical was run, the necessary patches were made, the ceiling patch job was fixed, and the closet was framed for new doors


It started out like this.
We inherited that terrible patch job; it is not our handiwork. 


The picture quality and composition are terrible.  We don't have very decent before pics.

This room really wasn't too bad.  It was almost livable - except for the whole wires hanging out of the wall thing.

I know everyone is lovin that ceiling fan and hoping that we kept it.  You'll just have to wait a bit longer to find out...

Wednesday, January 19, 2011

Marmalade

When passing by my parents house the other day I noticed that their citrus trees were loaded with ripe fruit.  What does one do with an overabundance of grapefruit and oranges?  Give them to your daughter of course.  And what does the daughter do with them?  Marmalade!  I've made lots of different types of jams and jellies, but this was my first foray into the world of marmalade.  That night I made a batch of grapefruit marmalade.  I'm a little worried that it cooked too long.  Hopefully it sets properly, and if it does I'll post a recipe so that I can remember next season. 


Tuesday, January 18, 2011

Look What I Can Do...


Finding and sorting pictures for remodel posts of each room is going to take some time. In the interim I thought I'd post a write up of a project the I did after the remodel was complete. 

When the den was finished we decided to use a small media shelf as a temporary console table.  The plan was to find a piece of furniture that we both loved which would fit the space.  After about a year of looking I'd had enough.  I figured I'd just build one myself; nevermind the fact that I had no experience building furniture.  Not really knowing where to begin I turned to my most trusted advisor.


I came across Ana White's blog Knock-off Wood, and based my console table loosely upon her plans for the Tao media cabinet.  Ana's plans were easy to follow and adapt; building the piece went quickly.  I think that it was assembled, with help for The Boy and his Daddy, in two evenings after work.  Finishing it was another story. It took almost a week to finish.  After sanding everything smooth, two coats of Lamp Black Milk Paint were applied, followed by a coat of PolyAcrylic and two coats of Brick Red Milk PaintOnce the second coat of red paint was dry it was time to get out more sandpaper.  Since the console table was going to live in our den, my husband and I decided that we wanted it to look very distressed to help hide any damage that The Boy was sure to inflict.  Once we'd achieved the level of distressing we wanted we clear coated the console table again (and again, and again) with PolyAcrylic.  We figured that three coats should help keep The Boy from destroying the finish too quickly.

Overall we're pretty happy with how it turned out.  We're able to hide DVDs, a Wii and the plethora of Wii accessories that The Boy and his Daddy need as well as an abundance of other TV/Internet related junk.  This was also our first experience with milk paint, and I have to say I've been extremely impressed. Even with an incredibly active little boy running around, the paint hasn't gouged or scrapped.  There has been virtually no wear and the finish had not needed any touch-ups.  (You'd be impressed if you could see the way The Boy treats furniture!) 

Here is the completed console table/media cabinet...

Ignore my horrible photography skills.  Maybe I'll work on them once I finish grad school.


Visit thecsiproject.com
Funky Junk's Sat Nite Special


Texas Monkey

UndertheTableandDreaming


Anything Related